Это многостраничная версия текущего раздела для печати.
Нажмите, чтобы распечатать .
Вернуться к обычному виду страницы .
Задачи оператора Операционные руководства по развертыванию, конфигурированию и поддержке кластера etcd.
1 - Как настроить демонстрационный кластер etcd Руководство по настройке кластера etcd
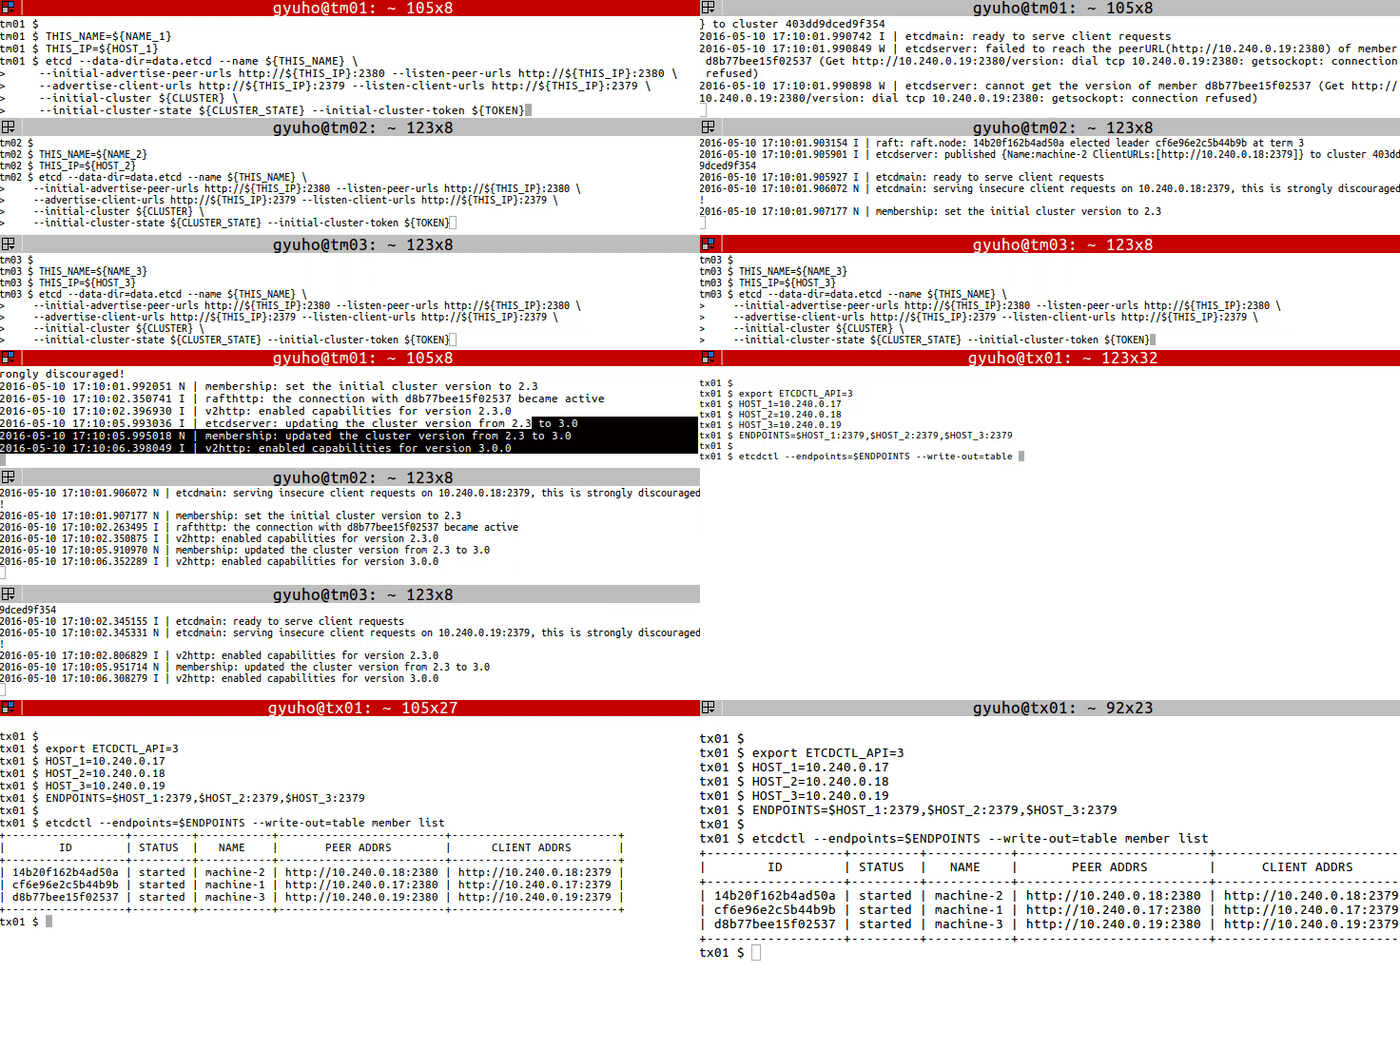
На каждом узле etcd укажите участников кластера:
TOKEN = token-01
CLUSTER_STATE = new
NAME_1 = machine-1
NAME_2 = machine-2
NAME_3 = machine-3
HOST_1 = 10.240.0.17
HOST_2 = 10.240.0.18
HOST_3 = 10.240.0.19
CLUSTER = ${ NAME_1 } = http://${ HOST_1 } :2380,${ NAME_2 } = http://${ HOST_2 } :2380,${ NAME_3 } = http://${ HOST_3 } :2380Выполните следующее на каждой машине:
# For machine 1
THIS_NAME = ${ NAME_1 }
THIS_IP = ${ HOST_1 }
etcd --data-dir= data.etcd --name ${ THIS_NAME } \
--initial-advertise-peer-urls http://${ THIS_IP } :2380 --listen-peer-urls http://${ THIS_IP } :2380 \
--advertise-client-urls http://${ THIS_IP } :2379 --listen-client-urls http://${ THIS_IP } :2379 \
--initial-cluster ${ CLUSTER } \
--initial-cluster-state ${ CLUSTER_STATE } --initial-cluster-token ${ TOKEN }
# For machine 2
THIS_NAME = ${ NAME_2 }
THIS_IP = ${ HOST_2 }
etcd --data-dir= data.etcd --name ${ THIS_NAME } \
--initial-advertise-peer-urls http://${ THIS_IP } :2380 --listen-peer-urls http://${ THIS_IP } :2380 \
--advertise-client-urls http://${ THIS_IP } :2379 --listen-client-urls http://${ THIS_IP } :2379 \
--initial-cluster ${ CLUSTER } \
--initial-cluster-state ${ CLUSTER_STATE } --initial-cluster-token ${ TOKEN }
# For machine 3
THIS_NAME = ${ NAME_3 }
THIS_IP = ${ HOST_3 }
etcd --data-dir= data.etcd --name ${ THIS_NAME } \
--initial-advertise-peer-urls http://${ THIS_IP } :2380 --listen-peer-urls http://${ THIS_IP } :2380 \
--advertise-client-urls http://${ THIS_IP } :2379 --listen-client-urls http://${ THIS_IP } :2379 \
--initial-cluster ${ CLUSTER } \
--initial-cluster-state ${ CLUSTER_STATE } --initial-cluster-token ${ TOKEN } Или воспользуйтесь общедоступной службой обнаружения:
curl https://discovery.etcd.io/new?size= 3
https://discovery.etcd.io/a81b5818e67a6ea83e9d4daea5ecbc92
# grab this token
TOKEN = token-01
CLUSTER_STATE = new
NAME_1 = machine-1
NAME_2 = machine-2
NAME_3 = machine-3
HOST_1 = 10.240.0.17
HOST_2 = 10.240.0.18
HOST_3 = 10.240.0.19
DISCOVERY = https://discovery.etcd.io/a81b5818e67a6ea83e9d4daea5ecbc92
THIS_NAME = ${ NAME_1 }
THIS_IP = ${ HOST_1 }
etcd --data-dir= data.etcd --name ${ THIS_NAME } \
--initial-advertise-peer-urls http://${ THIS_IP } :2380 --listen-peer-urls http://${ THIS_IP } :2380 \
--advertise-client-urls http://${ THIS_IP } :2379 --listen-client-urls http://${ THIS_IP } :2379 \
--discovery ${ DISCOVERY } \
--initial-cluster-state ${ CLUSTER_STATE } --initial-cluster-token ${ TOKEN }
THIS_NAME = ${ NAME_2 }
THIS_IP = ${ HOST_2 }
etcd --data-dir= data.etcd --name ${ THIS_NAME } \
--initial-advertise-peer-urls http://${ THIS_IP } :2380 --listen-peer-urls http://${ THIS_IP } :2380 \
--advertise-client-urls http://${ THIS_IP } :2379 --listen-client-urls http://${ THIS_IP } :2379 \
--discovery ${ DISCOVERY } \
--initial-cluster-state ${ CLUSTER_STATE } --initial-cluster-token ${ TOKEN }
THIS_NAME = ${ NAME_3 }
THIS_IP = ${ HOST_3 }
etcd --data-dir= data.etcd --name ${ THIS_NAME } \
--initial-advertise-peer-urls http://${ THIS_IP } :2380 --listen-peer-urls http://${ THIS_IP } :2380 \
--advertise-client-urls http://${ THIS_IP } :2379 --listen-client-urls http://${ THIS_IP } :2379 \
--discovery ${ DISCOVERY } \
--initial-cluster-state ${ CLUSTER_STATE } --initial-cluster-token ${ TOKEN } Теперь etcd готов к работе! Для подключения к etcd с помощью etcdctl выполните:
export ETCDCTL_API = 3
HOST_1 = 10.240.0.17
HOST_2 = 10.240.0.18
HOST_3 = 10.240.0.19
ENDPOINTS = $HOST_1 :2379,$HOST_2 :2379,$HOST_3 :2379
etcdctl --endpoints= $ENDPOINTS member list 2 - Как проводить выборы лидера в кластере etcd Шаги проведения выборов лидера с помощью клиента etcdctl
Предварительные требования Убедитесь, что установлен etcdetcdctl Проверьте наличие активного кластера etcd. Проведение выборов лидера Команда etcdctl используется для проведения выборов лидера в кластере etcd. Она гарантирует, что в один момент времени только один клиент может стать лидером.
etcdctl --endpoints=$ENDPOINTS elect <election-name> [proposal]
etcdctl --endpoints= $ENDPOINTS elect election-name p1 Параметры Адрес каждого участника кластера etcd.
Строка-идентификатор для выборов. Все участники, конкурирующие за лидерство, должны использовать одно и то же имя выборов.
Значение предложения нового лидера.
Пример ./etcdctl elect my-election proposal1
my-election/694d99fafea88404
proposal1
another election:
./etcdctl elect new-election proposal1
new-election/694d99fafea8840f
proposal1 3 - Как проверить состояние кластера Руководство по проверке состояния кластера etcd
Предварительные условия Проверка общего состояния Команда endpoint status проверяет общее состояние каждой конечной точки, указанной флагом --endpoints:
etcdctl endpoint status ( --endpoints= $ENDPOINTS | --cluster) Параметры --cluster[= false] : use all endpoints from the cluster member list Проверка работоспособности Команда endpoint health проверяет работоспособность каждой конечной точки, указанной флагом --endpoints:
etcdctl endpoint health ( --endpoints= $ENDPOINTS | --cluster) Параметры --cluster[= false] : use all endpoints from the cluster member list Проверка хеша KV Команда endpoint hashkv проверяет хеш истории KV каждой конечной точки, указанной флагом --endpoints:
etcdctl endpoint hashkv ( --endpoints= $ENDPOINTS | --cluster) [ rev = $REV ] Параметры --cluster[= false] : use all endpoints from the cluster member list
--rev= 0: maximum revision to hash ( default: latest revision) Параметры, унаследованные от родительских команд --endpoints= "127.0.0.1:2379" : gRPC endpoints
-w, --write-out= "simple" : set the output format ( fields, json, protobuf, simple, table) Примеры etcdctl --write-out= table --endpoints= $ENDPOINTS endpoint status
+------------------+------------------+---------+---------+-----------+------------+-----------+------------+--------------------+--------+
| ENDPOINT | ID | VERSION | DB SIZE | IS LEADER | IS LEARNER | RAFT TERM | RAFT INDEX | RAFT APPLIED INDEX | ERRORS |
+------------------+------------------+---------+---------+-----------+------------+-----------+------------+--------------------+--------+
| 10.240.0.17:2379 | 4917a7ab173fabe7 | 3.5.0 | 45 kB | true | false | 4 | 16726 | 16726 | |
| 10.240.0.18:2379 | 59796ba9cd1bcd72 | 3.5.0 | 45 kB | false | false | 4 | 16726 | 16726 | |
| 10.240.0.19:2379 | 94df724b66343e6c | 3.5.0 | 45 kB | false | false | 4 | 16726 | 16726 | |
+------------------+------------------+---------+---------+-----------+------------+-----------+------------+--------------------+--------| etcdctl --endpoints= $ENDPOINTS endpoint health
10.240.0.17:2379 is healthy: successfully committed proposal: took = 3.345431ms
10.240.0.19:2379 is healthy: successfully committed proposal: took = 3.767967ms
10.240.0.18:2379 is healthy: successfully committed proposal: took = 4.025451ms etcdctl --cluster endpoint hashkv --write-out= table
+------------------+------------+---------------+
| ENDPOINT | HASH | HASH REVISION |
+------------------+------------+---------------+
| 10.240.0.17:2379 | 3892279174 | 3 |
| 10.240.0.18:2379 | 3892279174 | 3 |
| 10.240.0.19:2379 | 3892279174 | 3 |
+------------------+------------+---------------+ 4 - Как сохранить базу данных Руководство по созданию снимка базы данных etcd
Предварительные требования Сделать снимок базы данных snapshot для создания снимка базы данных etcd в определённый момент времени:
etcdctl --endpoints= $ENDPOINT snapshot save DB_NAME Глобальные параметры etcdctl --endpoints=[ 127.0.0.1:2379] , gRPC endpoints Снимок можно запрашивать только у одного узла etcd, поэтому флаг --endpoints должен содержать только одну конечную точку.
etcdutl -w, --write-out string set the output format ( fields, json, protobuf, simple, table) ( default "simple" ) Пример ENDPOINTS = $HOST_1 :2379
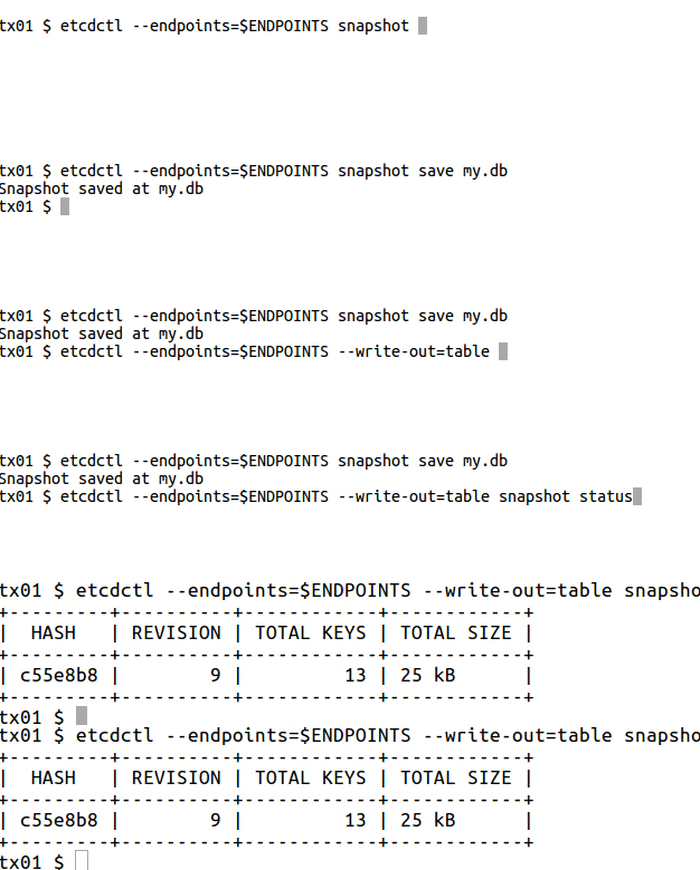
etcdctl --endpoints= $ENDPOINTS snapshot save my.db
Snapshot saved at my.db etcdutl --write-out= table snapshot status my.db
+---------+----------+------------+------------+
| HASH | REVISION | TOTAL KEYS | TOTAL SIZE |
+---------+----------+------------+------------+
| c55e8b8 | 9 | 13 | 25 kB |
+---------+----------+------------+------------+ 5 - Как добавлять и удалять участников Руководство по управлению составом кластера etcd
Команда member добавляет, удаляет и обновляет участников:
# For each machine
TOKEN = my-etcd-token-1
CLUSTER_STATE = new
NAME_1 = etcd-node-1
NAME_2 = etcd-node-2
NAME_3 = etcd-node-3
HOST_1 = 10.240.0.13
HOST_2 = 10.240.0.14
HOST_3 = 10.240.0.15
CLUSTER = ${ NAME_1 } = http://${ HOST_1 } :2380,${ NAME_2 } = http://${ HOST_2 } :2380,${ NAME_3 } = http://${ HOST_3 } :2380
# For node 1
THIS_NAME = ${ NAME_1 }
THIS_IP = ${ HOST_1 }
etcd --data-dir= data.etcd --name ${ THIS_NAME } \
--initial-advertise-peer-urls http://${ THIS_IP } :2380 \
--listen-peer-urls http://${ THIS_IP } :2380 \
--advertise-client-urls http://${ THIS_IP } :2379 \
--listen-client-urls http://${ THIS_IP } :2379 \
--initial-cluster ${ CLUSTER } \
--initial-cluster-state ${ CLUSTER_STATE } \
--initial-cluster-token ${ TOKEN }
# For node 2
THIS_NAME = ${ NAME_2 }
THIS_IP = ${ HOST_2 }
etcd --data-dir= data.etcd --name ${ THIS_NAME } \
--initial-advertise-peer-urls http://${ THIS_IP } :2380 \
--listen-peer-urls http://${ THIS_IP } :2380 \
--advertise-client-urls http://${ THIS_IP } :2379 \
--listen-client-urls http://${ THIS_IP } :2379 \
--initial-cluster ${ CLUSTER } \
--initial-cluster-state ${ CLUSTER_STATE } \
--initial-cluster-token ${ TOKEN }
# For node 3
THIS_NAME = ${ NAME_3 }
THIS_IP = ${ HOST_3 }
etcd --data-dir= data.etcd --name ${ THIS_NAME } \
--initial-advertise-peer-urls http://${ THIS_IP } :2380 \
--listen-peer-urls http://${ THIS_IP } :2380 \
--advertise-client-urls http://${ THIS_IP } :2379 \
--listen-client-urls http://${ THIS_IP } :2379 \
--initial-cluster ${ CLUSTER } \
--initial-cluster-state ${ CLUSTER_STATE } \
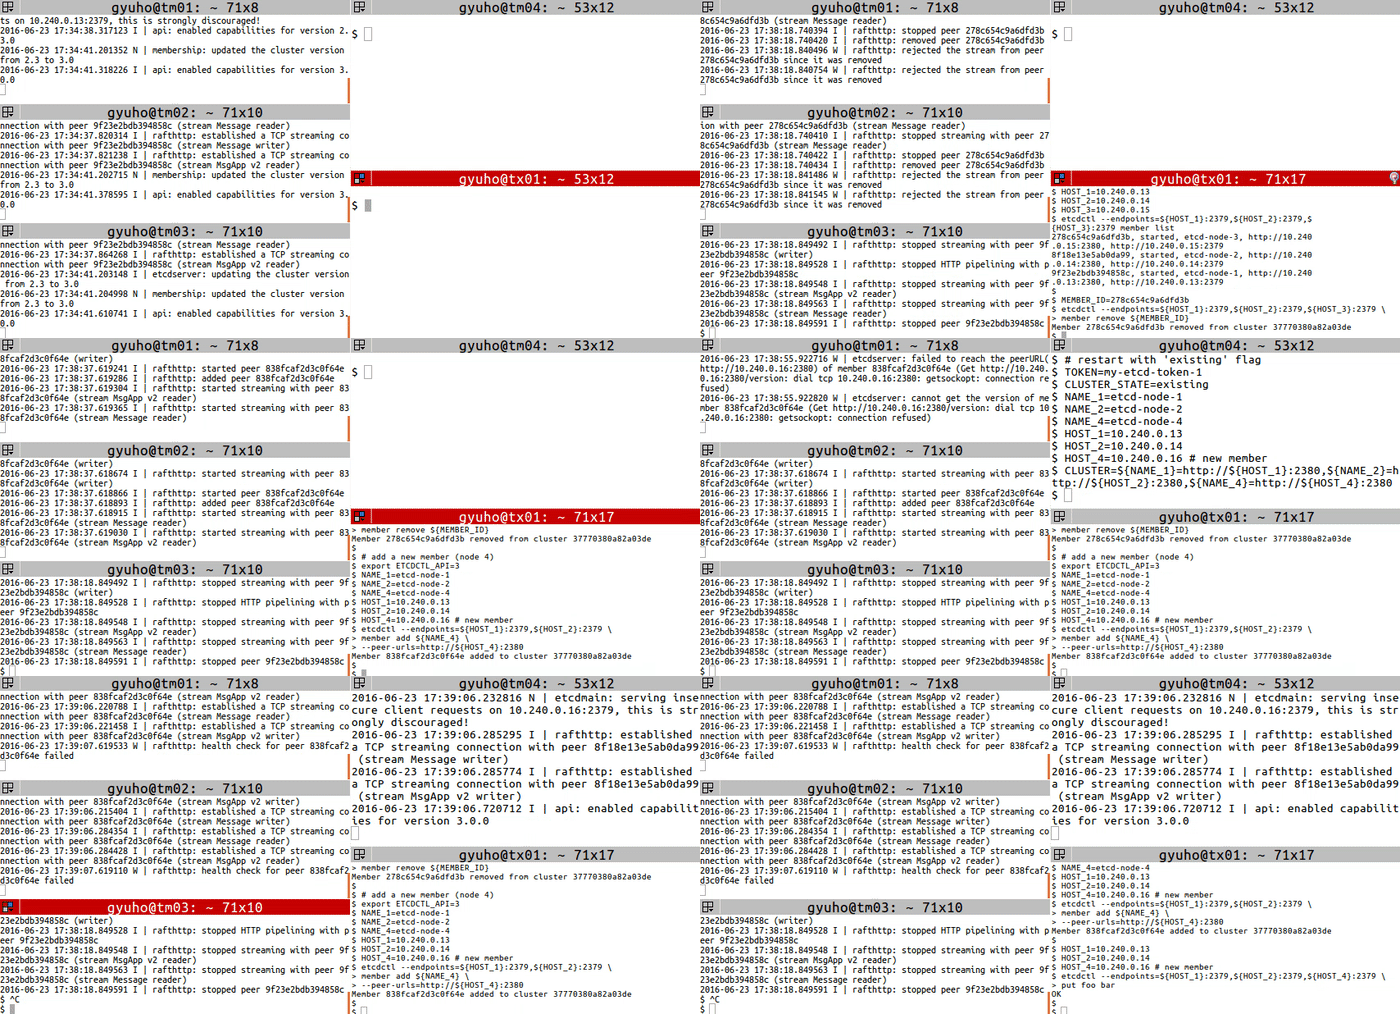
--initial-cluster-token ${ TOKEN } Затем замените участника командами member remove и member add:
# get member ID
export ETCDCTL_API = 3
HOST_1 = 10.240.0.13
HOST_2 = 10.240.0.14
HOST_3 = 10.240.0.15
etcdctl --endpoints= ${ HOST_1 } :2379,${ HOST_2 } :2379,${ HOST_3 } :2379 member list
# remove the member
MEMBER_ID = 278c654c9a6dfd3b
etcdctl --endpoints= ${ HOST_1 } :2379,${ HOST_2 } :2379,${ HOST_3 } :2379 \
member remove ${ MEMBER_ID }
# add a new member (node 4)
export ETCDCTL_API = 3
NAME_1 = etcd-node-1
NAME_2 = etcd-node-2
NAME_4 = etcd-node-4
HOST_1 = 10.240.0.13
HOST_2 = 10.240.0.14
HOST_4 = 10.240.0.16 # new member
etcdctl --endpoints= ${ HOST_1 } :2379,${ HOST_2 } :2379 \
member add ${ NAME_4 } \
--peer-urls= http://${ HOST_4 } :2380 После этого запустите нового участника с флагом --initial-cluster-state existing:
# [WARNING] If the new member starts from the same disk space,
# make sure to remove the data directory of the old member
#
# restart with 'existing' flag
TOKEN = my-etcd-token-1
CLUSTER_STATE = existing
NAME_1 = etcd-node-1
NAME_2 = etcd-node-2
NAME_4 = etcd-node-4
HOST_1 = 10.240.0.13
HOST_2 = 10.240.0.14
HOST_4 = 10.240.0.16 # new member
CLUSTER = ${ NAME_1 } = http://${ HOST_1 } :2380,${ NAME_2 } = http://${ HOST_2 } :2380,${ NAME_4 } = http://${ HOST_4 } :2380
THIS_NAME = ${ NAME_4 }
THIS_IP = ${ HOST_4 }
etcd --data-dir= data.etcd --name ${ THIS_NAME } \
--initial-advertise-peer-urls http://${ THIS_IP } :2380 \
--listen-peer-urls http://${ THIS_IP } :2380 \
--advertise-client-urls http://${ THIS_IP } :2379 \
--listen-client-urls http://${ THIS_IP } :2379 \
--initial-cluster ${ CLUSTER } \
--initial-cluster-state ${ CLUSTER_STATE } \
--initial-cluster-token ${ TOKEN }